Embedded Ansible
Since ManageIQ Fine release, automation has been easier in way that we just need to write Ansible playbooks for this. Embedded Ansible provides integrity to run playbooks.
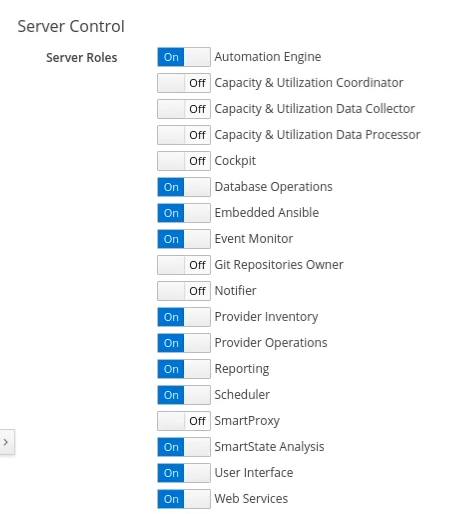
After the integration of OpenStack provider with ManageIQ, it is the time to enable Embedded Ansible server role in server controls of ManageIQ.
Enable Embedded Ansible
To enable Embedded Ansible, follow this:
Navigate to Administrator|EVM → Configuration which is present in upper right corner. This land us on the screen of Server Settings.
Turn on Embedded Ansible server role.
Click the Save button to carry forward the changes.

| Note | This will take some time depending upon the internet speed and appliance specifications. |
|---|---|
ManageIQ will generate event about Embedded Ansible activation in notification section.
To check the status of the task by ManageIQ, navigating to Administrator|EVM → Tasks and click on All Tasks tab.
We can also check that whether the Embedded Ansible role has started or not by executing command in appliance terminal:
$ vmdb; rake evm:status
| Warning | If the server role is not started, do check the log/evm.log and log/automation.log log files after execution of vmdb command. |
|---|---|
Add Repository
After the Embedded Ansible server role has successfully started, we can add a git repository of playbooks.
Perform following steps to add repository:
Navigate to Automation → Ansible → Repositories.
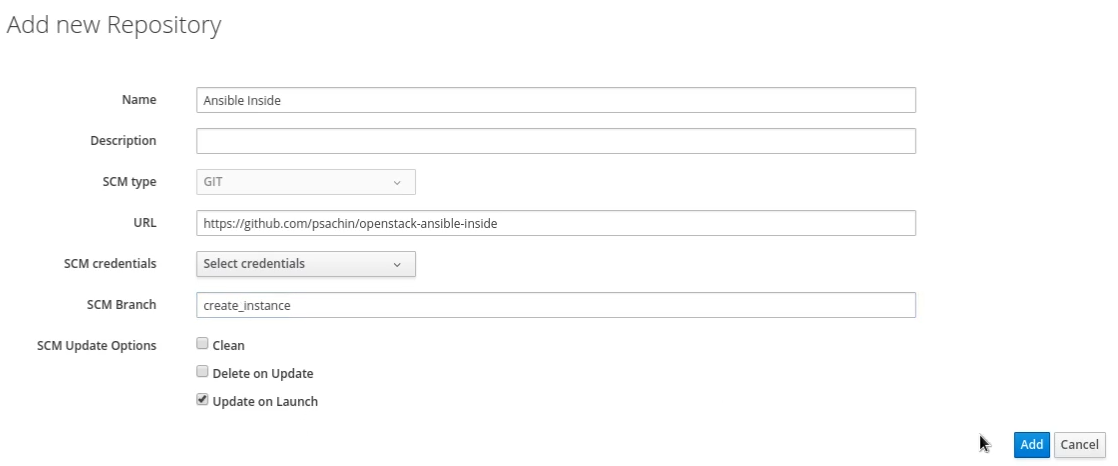
Walk to Configuration → Add New Repository. This shows a form to add repository details.
Give an appropriate Name to the repository.
Add Description about what the repository is exactly.
Choose the SCM type from the drop down list. By default, it is Git.
Enter the URL of the repository to be added. In our case, we have used playbooks that help us to create a instance, network in OpenStack. Refer this link for the playbook.
Add the SCM credentials from the drop down list whichever is appropriate.
SCM Branch field should be filled with the name of the branch.
Check the appropriate box for any SCM Update Options.
Click on Add button to save the changes.

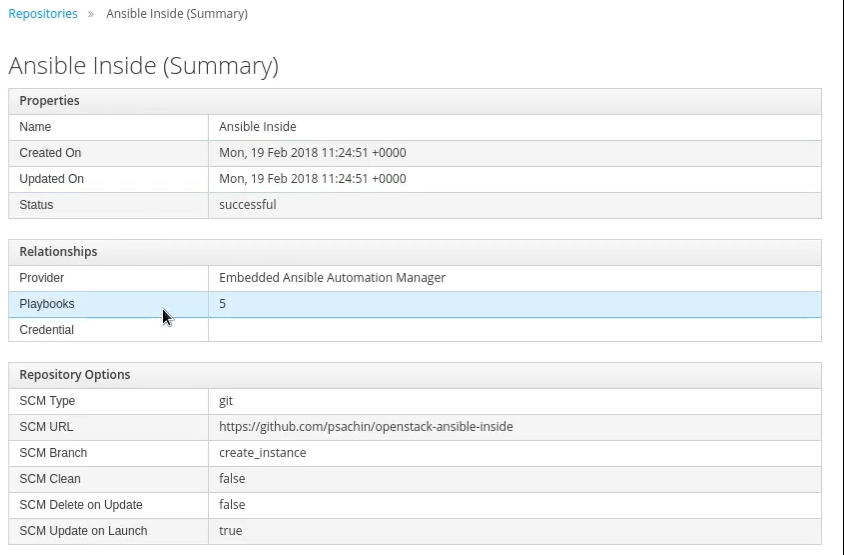
When repository has been added successfully, we can see repository details in ManageIQ web portal itself.
ManageIQ shows all the information regarding the repository like the name, created on, status, playbooks, etc. You can easily walk through playbooks present in repository by clicking Playbooks.

| Tip | To know about available Ansible modules for OpenStack, refer this link: http://docs.ansible.com/ansible/latest/list_of_cloud_modules.html#openstack |
|---|---|
Issue Faced
The installation of ManageIQ Fine was done with the integration of OpenStack Cloud provider. But after enabling Embedded Ansible Server role, we faced a issue for not starting that role and generation of lots of events.
Later, after checking the evm.log file we encountered that to setup
embedded ansible we need Ansible Tower enterprise license as ManageIQ
Fine release uses Ansible Tower for automation.
But as we didn't had any, so we upgrade ManageIQ to its latest stable release that is Gaprindashvili which uses AWX. AWX is open source version of Ansible Tower.
So we shifted to ManageIQ Gaprindashvili with the integration of OpenStack.